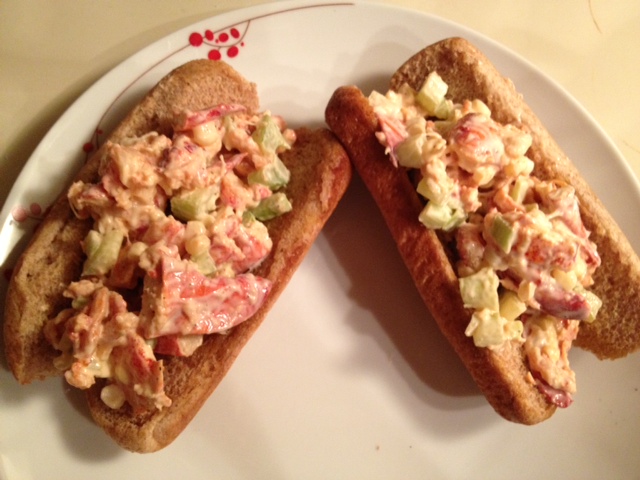
Yummy steamed lobster is paired with fresh summer corn and creamy mayo in this fast, delicious sandwich! Source: Real Simple
Directions- Fill a large saucepan with 1 inch of water and fit with a steamer basket. Bring to a simmer. Place the lobster tails in the steamer basket, cover, and steam until opaque throughout, 8 to 10 minutes. Remove the tails. Using kitchen shears, cut straight down the central membrane (the thin, paler pink portion on the inside of the tail) and pull apart to break the tail in half. Remove the meat from the shell immediately (to stop the cooking) and coarsely chop. Let cool.
- Meanwhile, melt 1 tablespoon of the butter in a large skillet over medium heat. Add the corn and cook, tossing, until tender, 2 to 4 minutes. Transfer to a large bowl and let cool; reserve the skillet. Add the lobster, celery, mayonnaise, lemon juice, and ¼ teaspoon each salt and pepper to the bowl and toss to combine.
- Brush the insides of the buns with the remaining 2 tablespoons of butter. Brown the buns, buttered-side down, in the reserved skillet over medium heat until golden, 5 to 7 minutes.
- Divide the lobster salad between the buns.
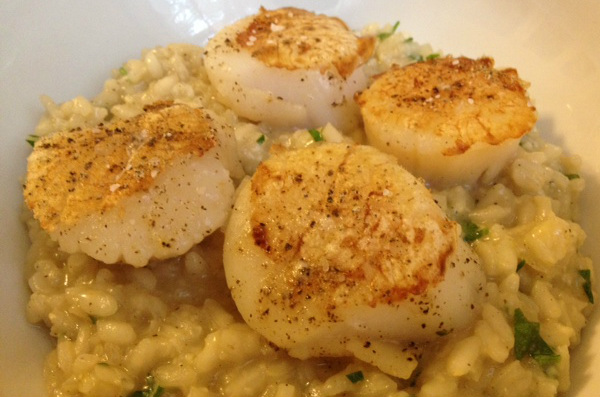
What a find this recipe is: elegant, decadent, and low in calories!
Let's start with the scallops. As an avid watcher of Hell's Kitchen, I can almost hear Chef Ramsey yelling at me when I cook scallops not to let them die. They are so easy to cook and so easy to get wrong. Make sure your pan is super hot and oiled or buttered and just cook them until done. Thirty seconds on either side and you will totally ruin them. The key is to sear each side quickly. Because they are small, the center will cook fast.
Now on to the risotto. Risotto is not hard to make. Really. It just takes a little patience. Finding the rice can be a pain. You'll need Arborio or Carnaroli rice. I've found Arborio rice at Trader Joe's. You'll need these rices that can be really absorbent to soak up all of the stock for maximal flavor. You may not need all of the stock you're using. Make sure you check your rice as you go along. As soon as it is soft enough to eat, take it off the heat source and stop adding liquid. No one likes a mushy risotto. There should be a little chewiness left in your rice.
The BEST part of this risotto that is made with delicious white wine and Parmesan? It's 481 calories a serving! Source: Skinnytaste.com Risotto
Servings: 3 • Size: 3/4 cup • Time: 30 minutes • Calories: 309
- 1 cup arborio rice
- 2 tsp butter
- 1 shallot, minced
- 1/2 cup white wine
- 4 cups fat free chicken stock
- salt and pepper
- 1/4 cup grated parmesan cheese
- 2 tbsp chopped parsley
Heat chicken stock in a small pot.
In a medium size heavy sauce pan, add butter on medium-low heat. Add shallots,saute about 1 minute. Add rice mixing well until well coated and translucent about 2 minutes. Add wine, salt and pepper and mix well until it is absorbed into the rice.Ladle 1 cup stock into rice and mix until all stock is absorbed, add another ladle, and continue adding and stirring until all broth is absorbed, about 20-25 minutes. Add parmesan cheese and parsley, mix well and serve.
Scallops
Servings: 3 • Size: 5 oz • Time: 10 minutes • Calories: 172
- 16 oz (about 12-14) sea scallops
- salt and fresh pepper
- 2 tsp butter
- 1 tsp olive oil
- 1 shallot, minced
- 10 oz baby spinach, washed
Wash scallops and pat dry with a paper towel. Season with salt and pepper. Heat a medium size pan on a high flame. When pan is hot, melt 1 tsp butter and place half of the scallops in the pan. Sear without touching them for a few minutes until the bottom forms a nice caramel colored crust. Turn over and cook about another minute or 2, until the center is slightly translucent (you can check this by viewing them from the side) and the bottom is seared. Be careful not to overcook. Remove from the pan and set aside on a warm plate. Add addition tsp butter and cook remaining scallops.
Add olive oil to the pan and saute shallots, add spinach, salt and pepper. Toss until spinach wilts.
Serve over spinach over risotto topped with scallops.
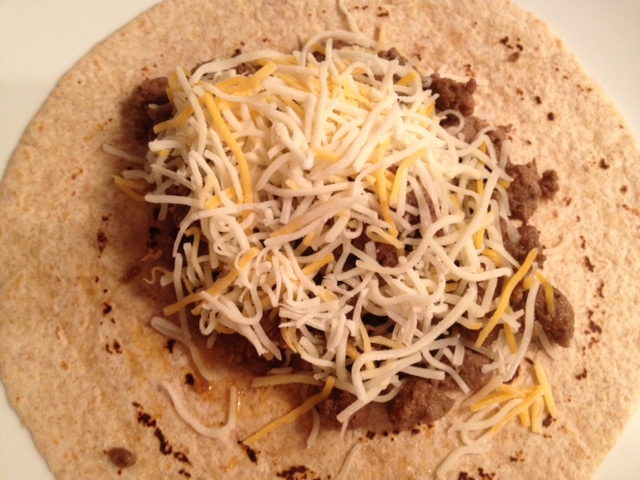
I got some great local grass fed ground beef and wanted to do something easy and simple with it. I am really impressed with how delicious and simple this seasonings recipe is. I added this to a pound of beef and cooked it in cast iron skillet. I served it on a whole wheat tortilla with some Mexican cheese and a craft local beer. Yum! Source: Allrecipes.com- 1 tablespoon chili powder (I cut this back to 1 tsp)
- 1/4 teaspoon garlic powder
- 1/4 teaspoon onion powder
- 1/4 teaspoon crushed red pepper flakes
- 1/4 teaspoon dried oregano
- 1/2 teaspoon paprika
- 1 1/2 teaspoons ground cumin
- 1 teaspoon sea salt
- 1 teaspoon black pepper
Mix together and enjoy!
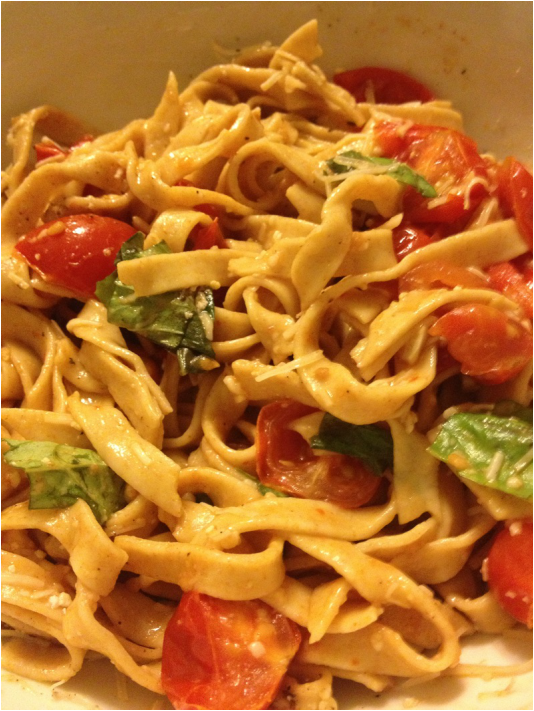
This is not a new recipe on the blog but deserves to be re-posted. This time I made it with handmade fresh pasta. Delicate homemade pasta tastes best with light or creamy sauces and this recipe is perfect to highlight its fresh flavors. I used organic, fresh tomatoes and it was one of the best things I've ever made! Source: America's Test Kitchen
6 c cherry tomatoes (about 2 pounds), halved
1 shallot, halved and sliced thin
2 T olive oil
1 T balsamic vinegar
3 garlic cloves, sliced thin
1 t sugar
1/8 t red pepper flakes
salt and pepper
12 oz whole-wheat penne or other pasta
1/2 c grated Parmesan cheese
1/4 c shredded fresh basil (I use a lot more; you can never use too much!!)
1. Preheat oven to 350 degrees. Toss the tomatoes with the shallot, oil, vinegar, garlic, sugar, red pepper flakes, 1/2 teaspoon salt, and 1/4 teaspoon pepper in a bowl.
2. Spread the tomatoes out over a rimmed baking sheet. Roast until the tomato skins have shriveled slightly but the tomatoes still retain their shape 35-40 minutes.
3. Cook the pasta. Reserve 1/2 cup of cooking water and drain. Return to the pot.
4. Add the tomatoes to the pasta. Add 1/4 cup of Parmesan and basil and toss gently to combine. Before serving, add the reserved cooking water as needed to loosen the sauce, season with salt and pepper to taste, and sprinkle with the remaining 1/4 cup of Parmesan.
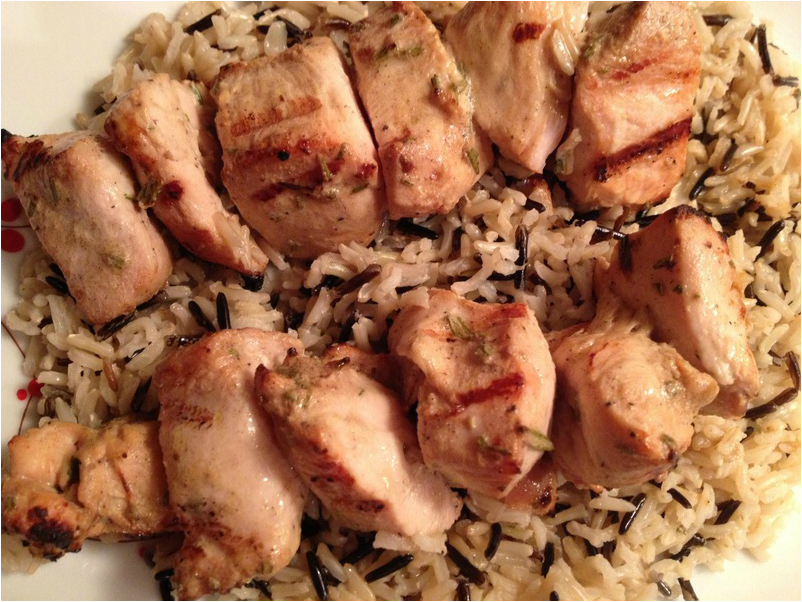
I don't make a lot of chicken because I think it's kind of boring. But I think marinated, grilled chicken can be great. This recipe is very flavorful and the meat was quite tender. I served this over organic brown and wild rice. Source: Allrecipes.com- 1/2 cup olive oil
- 1/2 cup ranch dressing
- 3 tablespoons Worcestershire sauce
- 1 tablespoon minced fresh rosemary
- 2 teaspoons salt
- 1 teaspoon lemon juice
- 1 teaspoon white vinegar
- 1/4 teaspoon ground black pepper, or to taste
- 1 tablespoon white sugar, or to taste (optional)
- 5 skinless, boneless chicken breast halves - cut into 1 inch cubes
- In a medium bowl, stir together the olive oil, ranch dressing, Worcestershire sauce, rosemary, salt, lemon juice, white vinegar, pepper, and sugar. Let stand for 5 minutes. Place chicken in the bowl, and stir to coat with the marinade. Cover and refrigerate for 30 minutes.
- Preheat the grill for medium-high heat. Thread chicken onto skewers and discard marinade.
- Lightly oil the grill grate. Grill skewers for 8 to 12 minutes, or until the chicken is no longer pink in the center, and the juices run clear.
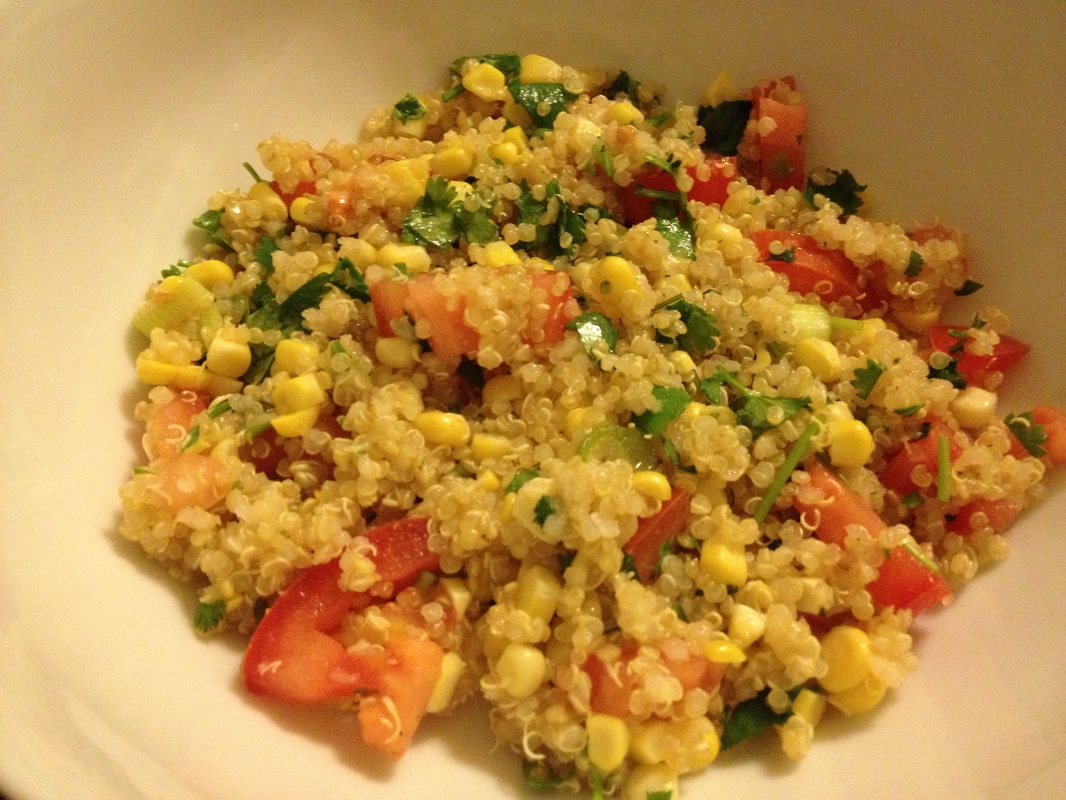
Here's a great summer vegetarian dinner or side dish. It features quinoa, a perfect protein and a whole grain with a low glycemic index. I didn't feel like grilling the corn; so I used the oven method featured at the end of the recipe. I also only used four ears of corns. Source: Food Republic- 5 ears corn, husks on but silks removed
- 4 green onions, roots and tops trimmed
- 2 cups quinoa, well rinsed
- 3 1/4 cups water
- salt
- 4 plum tomatoes, cored, seeded, and diced
- 1 cup lightly packed cilantro leaves and tender stems, chopped
- juice of 3 limes (about 1/4 cup)
- 2 tablespoons olive oil
- black pepper
Soak the corn
- Place the corn in a large stockpot, or other container large enough to hold all the ears, and fill it with water. If you do not have a sufficiently large container, use your kitchen sink.
- Allow the corn to soak for 20 minutes. Remove from the water, shake, and tightly squeeze the husks against the kernels of corn to get rid of any excess water.
Grill the corn- Heat your grill to high (550F) and close the lid. Wait at least 15 minutes before lowering the heat to medium-high (450F) and continuing. (Or see Cooking Notes for instructions on roasting the corn in an oven.)
- Place the corn on the grill rack, close the lid, and grill for 5 minutes. Turn the corn over and grill for another 5 minutes with the lid closed. Remove from the grill and let rest for 5 more minutes.
Pull back the husks and char the corn- Take the grilled ears of corn and pull back the husks, exposing the kernels. Do not remove the husks. If possible, tie the husks back (see Cooking Notes).
- Increase the grill temperature to high (550F). Place a sheet of aluminum foil on one side of the hot grill. Place the pulled-back husks over the foil, allowing the exposed kernels to sit on the grill grates. (This is done so the husks don’t burn before the corn can char.) Close the grill lid and allow the kernels to char for about 5 minutes per side, or until they become dark and golden brown on all sides.
- At this point, add the green onions to the grill and char on all sides, about 8 minutes total. Remove the corn and green onions from the grill and set aside.
Prepare the quinoa
Put the quinoa, water, and 1 teaspoon salt in a saucepan. Bring to a boil, cover, and lower to a simmer. Cook for 15 minutes. Uncover and check if the quinoa is ready by tilting the pan to the side to make sure all the water has been absorbed. If not, continue cooking for a few minutes more. Transfer the cooked quinoa to a large bowl and allow to cool at room temperature.
Toss and dress the salad and serve
Cut the corn kernels off the cobs, slice the grilled green onions, and add both to the quinoa. Toss in the tomatoes and cilantro and mix well. Drizzle the lime juice and olive oil over the salad and season with salt and pepper to taste. Toss well before serving.
Cooking quinoa- Quinoa should always be rinsed well under cold running water before it’s cooked; otherwise it will have a rather bitter taste.
- Package instructions for preparing quinoa state that you should use 2 cups of liquid to 1 cup of quinoa. I find this ratio results in a soggy texture that does not work well in a grain salad. Therefore, this recipe uses a proportion of approximately 11/2 cups of liquid to 1 cup of grain in order to end up with a grain that will stay intact when tossed with the vinaigrette and vegetables.
Roasting the corn
This recipe can easily be made in the oven using corn kernels that have been removed from the cob, or 3 cups of frozen corn that has been thawed. Preheat your oven to 400F. Roast the corn in a single layer on a baking sheet for 20 minutes, then allow to rest outside the oven for another 5 minutes. If you like, the green onions can just be left raw or can be roasted with the corn.
Tying back the corn husks
After the corn has been grilled in the husks, the husks will have dried out. When you pull the husks back to char the kernels, remove two pieces of dried husk and wrap them around the corn husks, tying them into a knot (you may need to be a bit delicate so as not to break the husks). This step is optional but will result in beautiful presentation.
|
 RSS Feed