Here's a great summer vegetarian dinner or side dish. It features quinoa, a perfect protein and a whole grain with a low glycemic index. I didn't feel like grilling the corn; so I used the oven method featured at the end of the recipe. I also only used four ears of corns.
Source: Food Republic
Soak the corn
Put the quinoa, water, and 1 teaspoon salt in a saucepan. Bring to a boil, cover, and lower to a simmer. Cook for 15 minutes. Uncover and check if the quinoa is ready by tilting the pan to the side to make sure all the water has been absorbed. If not, continue cooking for a few minutes more. Transfer the cooked quinoa to a large bowl and allow to cool at room temperature.
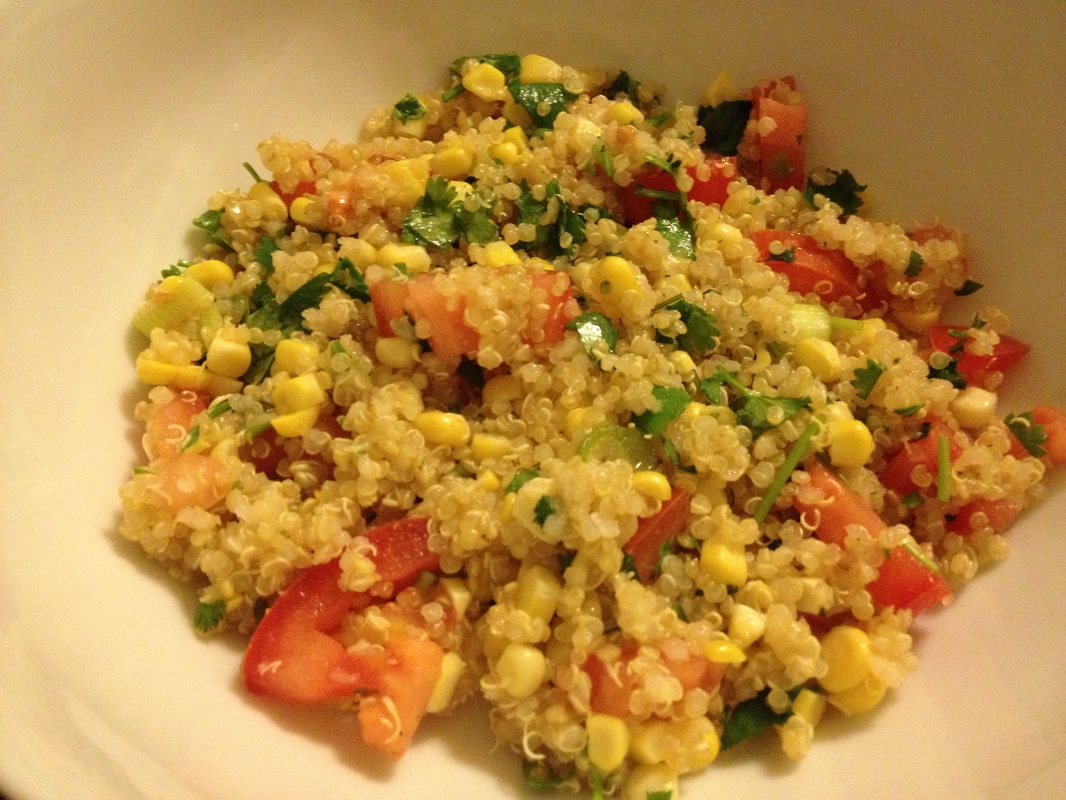
Toss and dress the salad and serve
Cut the corn kernels off the cobs, slice the grilled green onions, and add both to the quinoa. Toss in the tomatoes and cilantro and mix well. Drizzle the lime juice and olive oil over the salad and season with salt and pepper to taste. Toss well before serving.
Cooking quinoa
This recipe can easily be made in the oven using corn kernels that have been removed from the cob, or 3 cups of frozen corn that has been thawed. Preheat your oven to 400F. Roast the corn in a single layer on a baking sheet for 20 minutes, then allow to rest outside the oven for another 5 minutes. If you like, the green onions can just be left raw or can be roasted with the corn.
Tying back the corn husks
After the corn has been grilled in the husks, the husks will have dried out. When you pull the husks back to char the kernels, remove two pieces of dried husk and wrap them around the corn husks, tying them into a knot (you may need to be a bit delicate so as not to break the husks). This step is optional but will result in beautiful presentation.
- 5 ears corn, husks on but silks removed
- 4 green onions, roots and tops trimmed
- 2 cups quinoa, well rinsed
- 3 1/4 cups water
- salt
- 4 plum tomatoes, cored, seeded, and diced
- 1 cup lightly packed cilantro leaves and tender stems, chopped
- juice of 3 limes (about 1/4 cup)
- 2 tablespoons olive oil
- black pepper
Soak the corn
- Place the corn in a large stockpot, or other container large enough to hold all the ears, and fill it with water. If you do not have a sufficiently large container, use your kitchen sink.
- Allow the corn to soak for 20 minutes. Remove from the water, shake, and tightly squeeze the husks against the kernels of corn to get rid of any excess water.
- Heat your grill to high (550F) and close the lid. Wait at least 15 minutes before lowering the heat to medium-high (450F) and continuing. (Or see Cooking Notes for instructions on roasting the corn in an oven.)
- Place the corn on the grill rack, close the lid, and grill for 5 minutes. Turn the corn over and grill for another 5 minutes with the lid closed. Remove from the grill and let rest for 5 more minutes.
- Take the grilled ears of corn and pull back the husks, exposing the kernels. Do not remove the husks. If possible, tie the husks back (see Cooking Notes).
- Increase the grill temperature to high (550F). Place a sheet of aluminum foil on one side of the hot grill. Place the pulled-back husks over the foil, allowing the exposed kernels to sit on the grill grates. (This is done so the husks don’t burn before the corn can char.) Close the grill lid and allow the kernels to char for about 5 minutes per side, or until they become dark and golden brown on all sides.
- At this point, add the green onions to the grill and char on all sides, about 8 minutes total. Remove the corn and green onions from the grill and set aside.
Put the quinoa, water, and 1 teaspoon salt in a saucepan. Bring to a boil, cover, and lower to a simmer. Cook for 15 minutes. Uncover and check if the quinoa is ready by tilting the pan to the side to make sure all the water has been absorbed. If not, continue cooking for a few minutes more. Transfer the cooked quinoa to a large bowl and allow to cool at room temperature.
Toss and dress the salad and serve
Cut the corn kernels off the cobs, slice the grilled green onions, and add both to the quinoa. Toss in the tomatoes and cilantro and mix well. Drizzle the lime juice and olive oil over the salad and season with salt and pepper to taste. Toss well before serving.
Cooking quinoa
- Quinoa should always be rinsed well under cold running water before it’s cooked; otherwise it will have a rather bitter taste.
- Package instructions for preparing quinoa state that you should use 2 cups of liquid to 1 cup of quinoa. I find this ratio results in a soggy texture that does not work well in a grain salad. Therefore, this recipe uses a proportion of approximately 11/2 cups of liquid to 1 cup of grain in order to end up with a grain that will stay intact when tossed with the vinaigrette and vegetables.
This recipe can easily be made in the oven using corn kernels that have been removed from the cob, or 3 cups of frozen corn that has been thawed. Preheat your oven to 400F. Roast the corn in a single layer on a baking sheet for 20 minutes, then allow to rest outside the oven for another 5 minutes. If you like, the green onions can just be left raw or can be roasted with the corn.
Tying back the corn husks
After the corn has been grilled in the husks, the husks will have dried out. When you pull the husks back to char the kernels, remove two pieces of dried husk and wrap them around the corn husks, tying them into a knot (you may need to be a bit delicate so as not to break the husks). This step is optional but will result in beautiful presentation.
 RSS Feed